Get Started
Lets introduce a real time automated Software SocBot which checks your gmail data authencity. The main goal always active to check emails and active agents. It has also the fetures to make the automated Phone calls and Messages as well.
Configuration
We need some of important requirements for Local and live Configuration. Please check below the lists.
Local Installation
Local installation in windows we are using Laragon for create local server and Phpmyadmin for database visualisation.
After successfully setup Largon and phpmyadmin we have to create a blank project inside Laragon and Largon
will automatically created a virtual host itself example.test. Where some of other local server
software doens't has this features. Let's see in below step by step
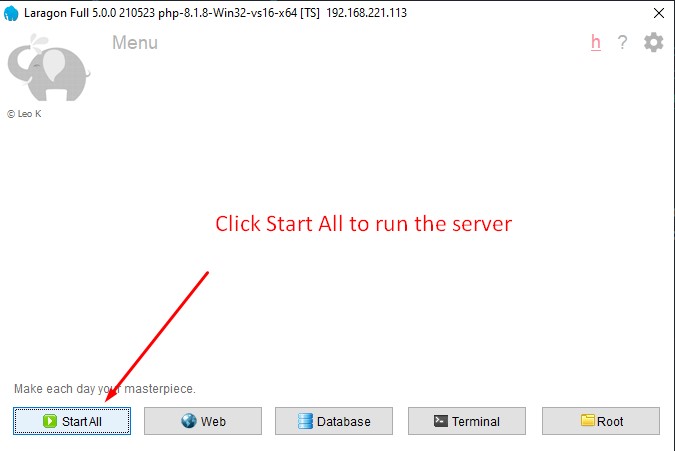
Step #1:
Create new project we have to run our laragon server
Step #2:
Click right button on the laragon panel you will get the option Quick app > Blank
Provide the name of your project and Database name as well.
Step #3:
- Here I create my project name Socbot
- So We have to go the root directory in largon which located is in your installation drive
C:\laragon\www
- Find your project folder and go inside
- Open your git bash terminal - Download Git Bash
- Clone the project from your Github Repo
https://github.com/mike197312/socbot.git- After finish cloning run this
composer update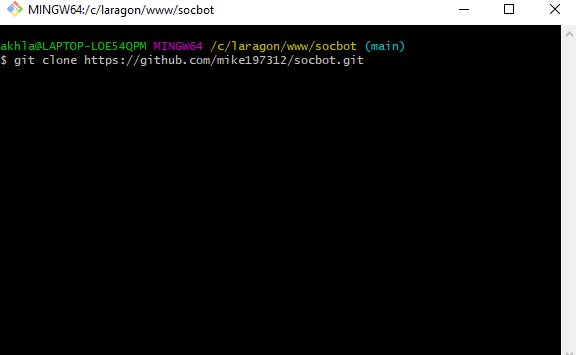
Step #4:
- Make sure your folder and files are in the socbot root dir
- create .htaccess file if you don't see in your dirtectory
- Paste this code
                    Options -MultiViews

                RewriteEngine On
                RewriteCond %{REQUEST_FILENAME} -d [OR]
                RewriteCond %{REQUEST_FILENAME} -f
                RewriteRule ^ ^$1 [N]
                RewriteCond %{REQUEST_URI} (\.\w+$) [NC]
                RewriteRule ^(.*)$ public/$1

                RewriteCond %{REQUEST_FILENAME} !-d
                RewriteCond %{REQUEST_FILENAME} !-f
                RewriteRule ^ server.php
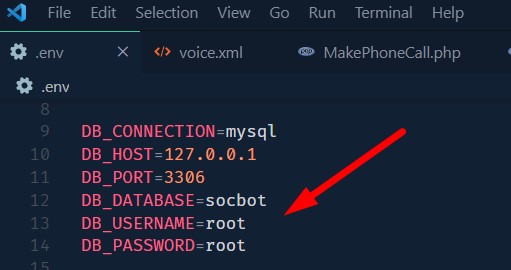
- open the folder into your Vs Code
- Go
.env file and change the database name / user and password - Default username: root
and password: root- Now you can open the the site link like http://socbot.test into your browser
Forge Configuration
What is Forge?
Laravel Forge is a server management and application deployment service. Forge takes the pain and hassle out of deploying servers and can be used to launch your next website. Whether your app is built with a framework such as Laravel, Symfony, Statamic, WordPress, or is just a vanilla PHP application - Forge is the solution for you.
We live and breathe PHP here at Forge, but Forge is also ready to handle other tech stacks too, such as NodeJS.
After connecting to your preferred server provider, Forge will be able to provision new servers for you in minutes. We offer you the ability to provision multiple server types (e.g. web servers, database servers, load balancers) with the option of having an array of services configured for you to hit the ground running, including:
- Nginx web server
- PHP (multiple version support)
- Database (MySQL, Postgres, or MariaDB)
- Logrotate
- UFW Firewall
- OPcache
- Memcached
- Redis
- MeiliSearch
- Automatic Security Updates
- And much more!
Lets configure Laravel Forge Step by Step
- Create a New Forge account or existing account
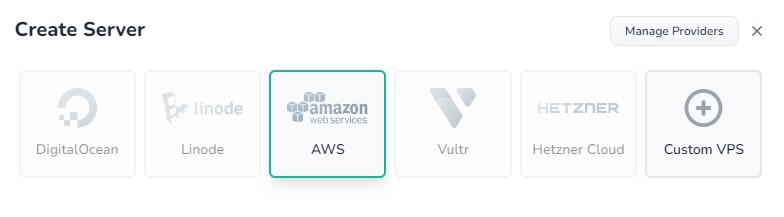
- You need also a Digital Ocean or AWS or Forge support the cloud account and create an API for Forge
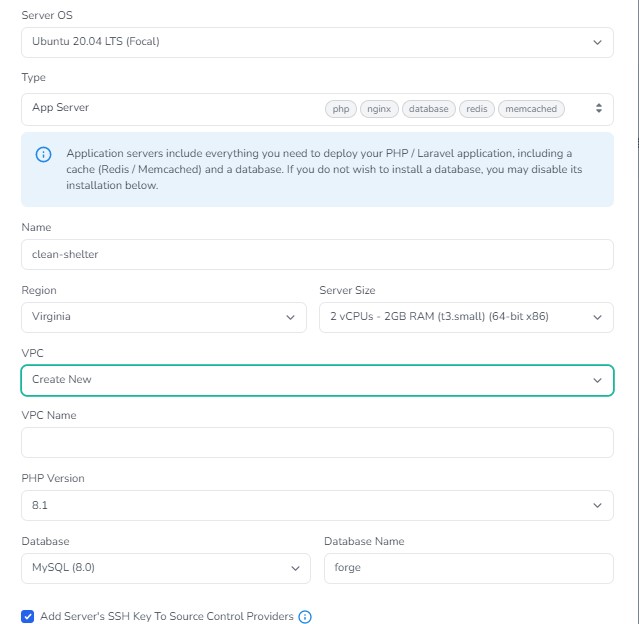
- Login your Forge panel and create server
- After finish the server creation you have to create the sites
- create your site as your domain name and after you will get the option to connect your github
account
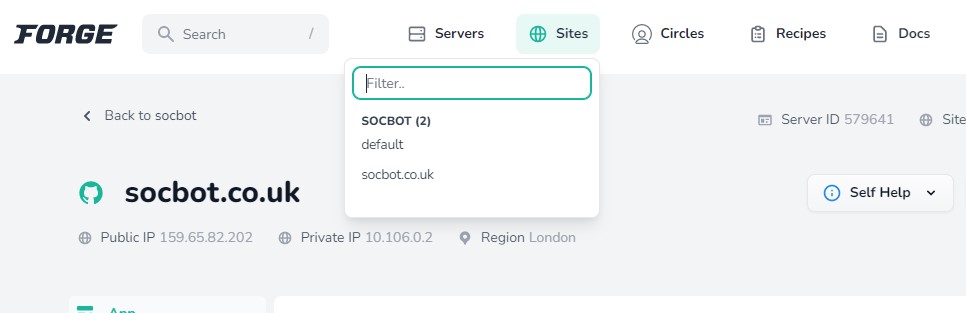
Laravel forge Site Create
Laravel Forge how works ?
Server management doesn't have to be a nightmare and it's true. Forge takes the pain and hassle out of deploying servers. How forege I will try to describe it to focus some of main points.
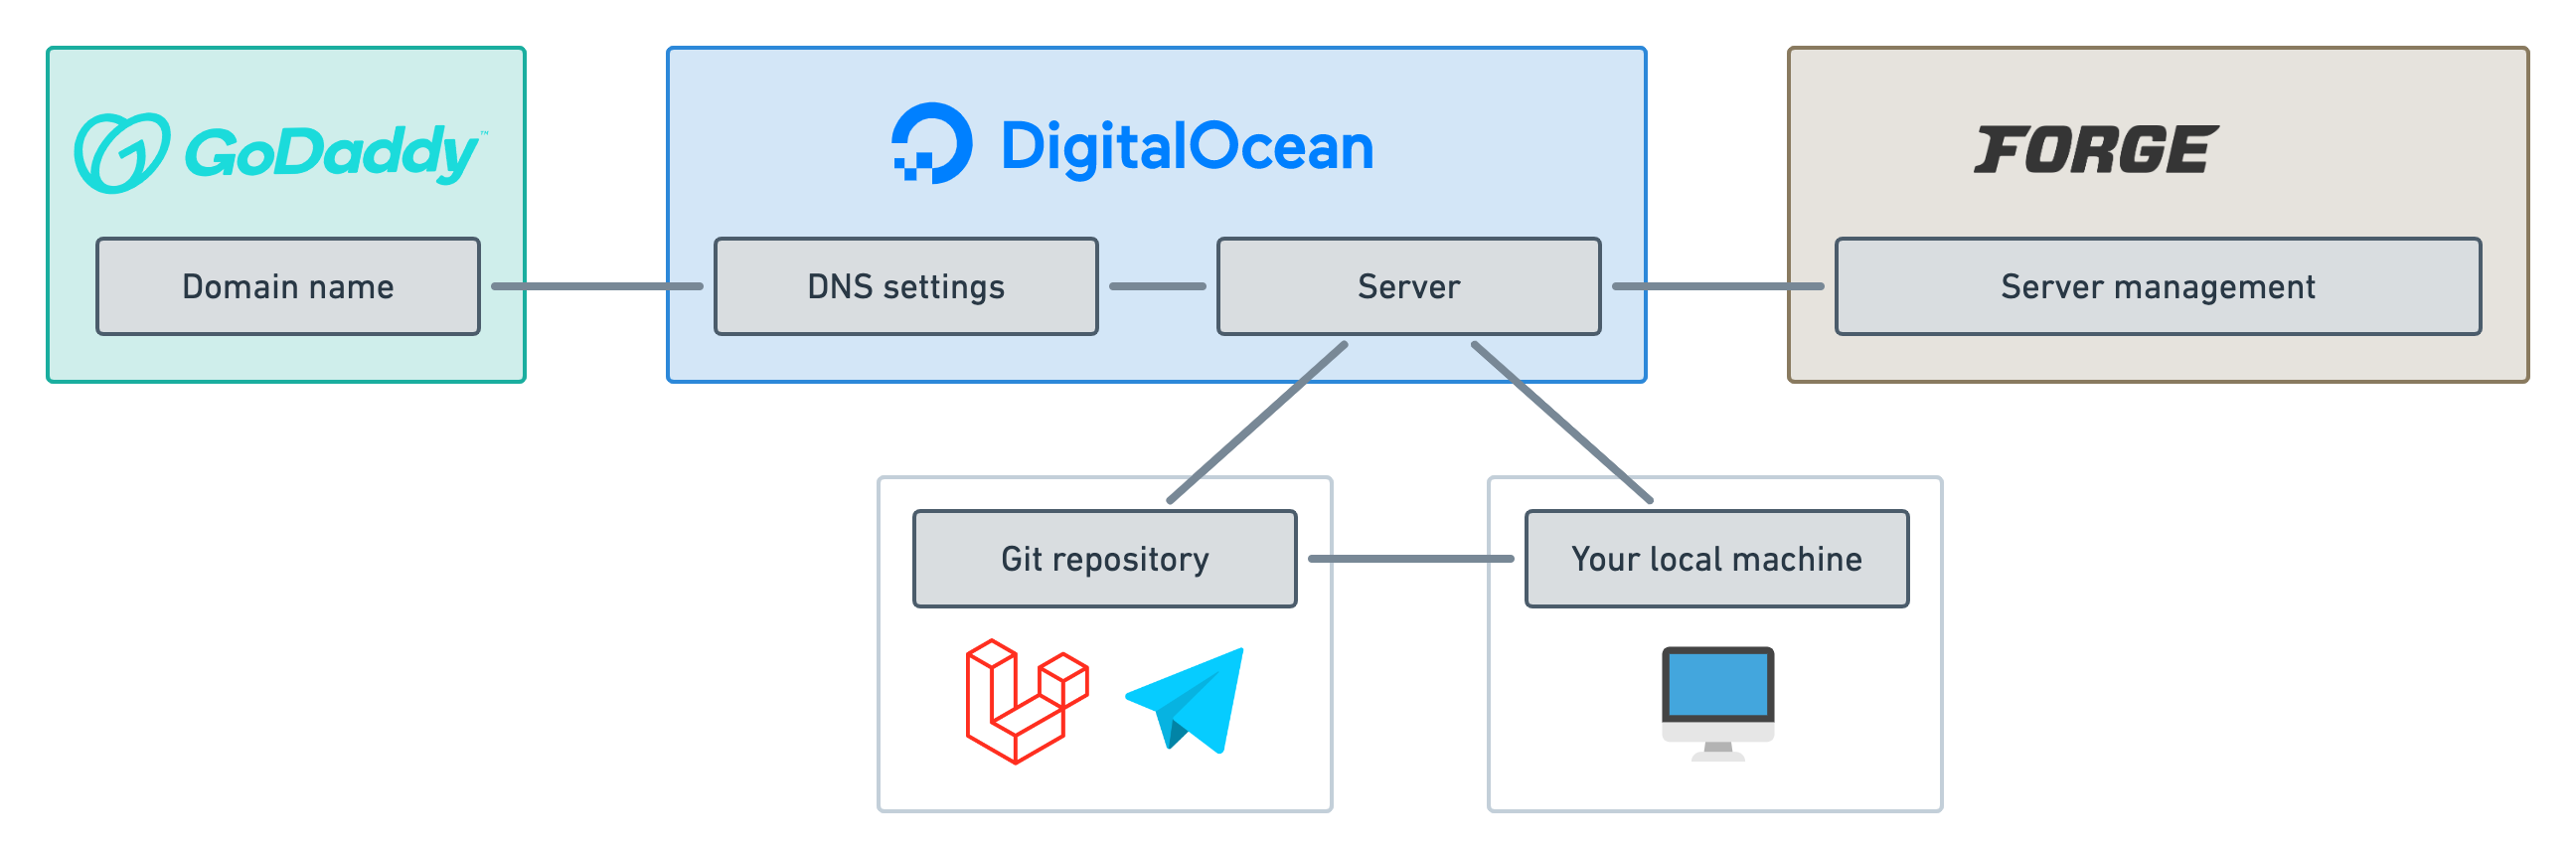
- Here we have a domain which located in Godaddy. We have to add A record with the forge public IP address
then it's automatically point with the server
- We have digital ocean droplet which better called the (VPS). A VPS setup is not a pice of cake.
Basically here Laravel Forge play the main role to help faster deployment.
- When we create the forge server it's installed mainly on the Digital Ocean droplet. It's configured all
the important features and setup all the security as well.
- The best feature in Laravel forge which connect with Github account directly. When we develop locally
and push code on Github forge push the code also on the digital Ocean droplet and instantly we can see the
live updates.
- So here we have directly access to the local machine to the live server.
- And another important things is we need to run some commands on the the live server to execute automated
script.
php artisan run:schedule and laravel has also the queue command. Here laravel forge
has more flexible option to set background worker. - Laravel Forge has all pre installed set up such as linux supervisor. which supervisor all the backend
commands.
- Forge has the option to work with team and it's can keep track the members activity.
- Forge also give us the Recipe option to give us more advance features.
Twilio configuration
- Create a New Twilio account or existing account
- Login your Twilio account and go Studio -> Flow -> create a new Flow
- Build Your logic and get the REST API

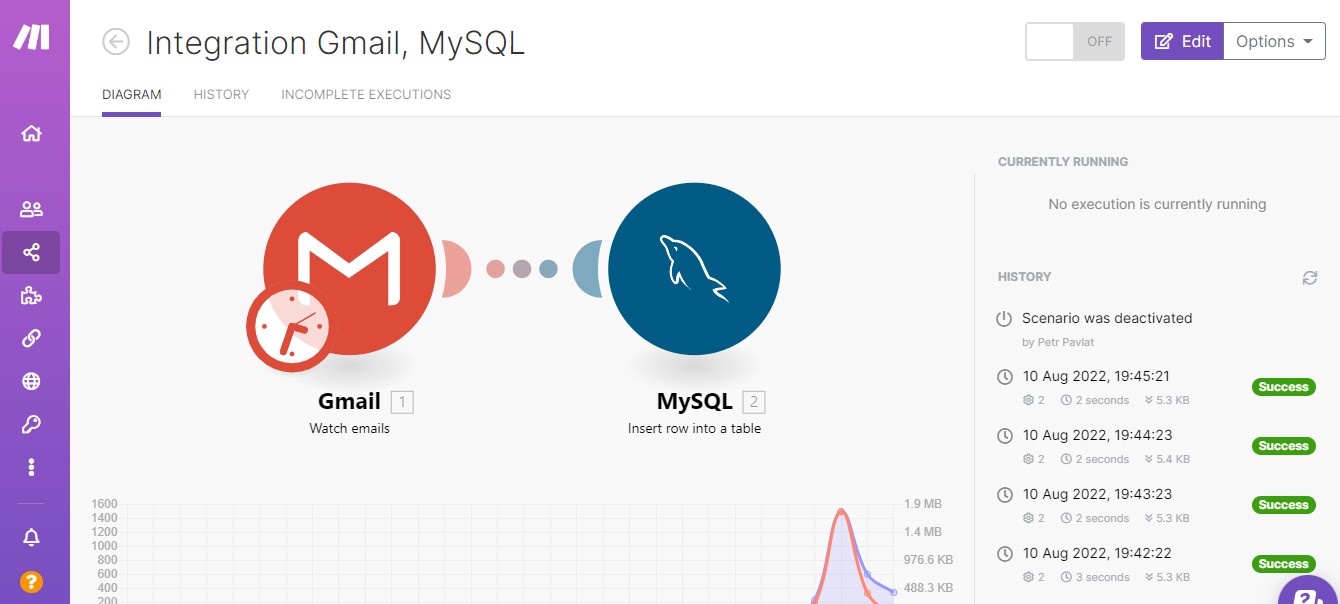
MAKE configuration
- Create a New MAKE account or existing account
- Login your MAKE account and go Scenario -> create a new Scenario
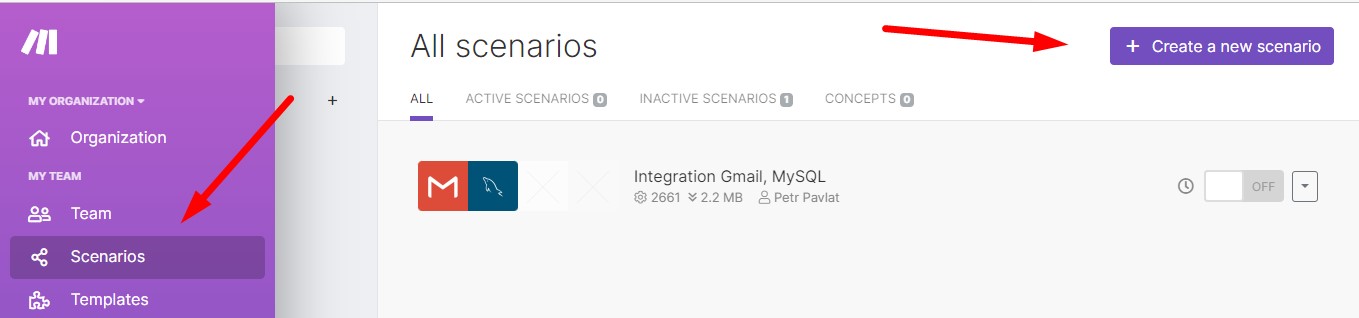
- Build Your logic with MAKE
Let's discuss with PHP Laravel Codebase
Acknowledgment Table
web.php Folder Structure
    socbot
        -routes
          -web.php
web.php
Laravel define all links in web.php file. you can see the file to check the Acknowledgment routes.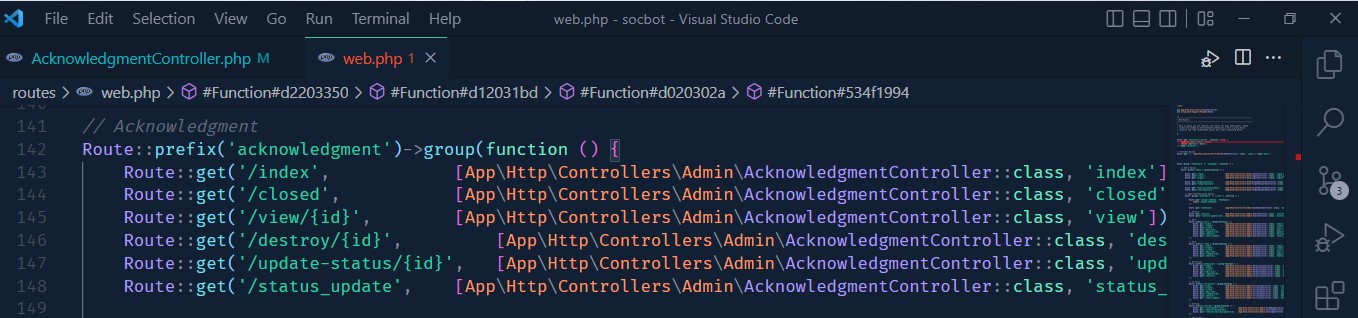
AcknowledgmentController.php Folder Structure
    socbot
        -app
          -Http
            -Controllers
              -Admin
                -AcknowledgmentController.php
AcknowledgmentController.php
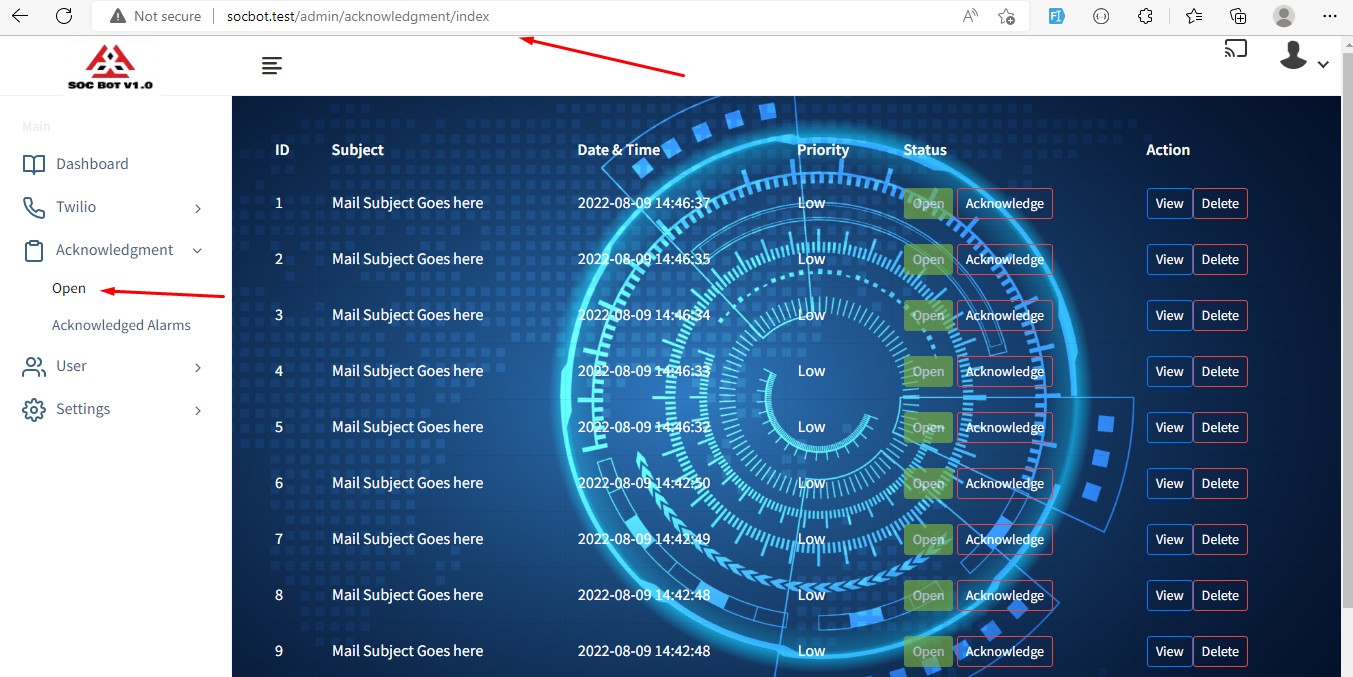
Here is the index function render all data to the Acknowledgment Table. You can set the pagination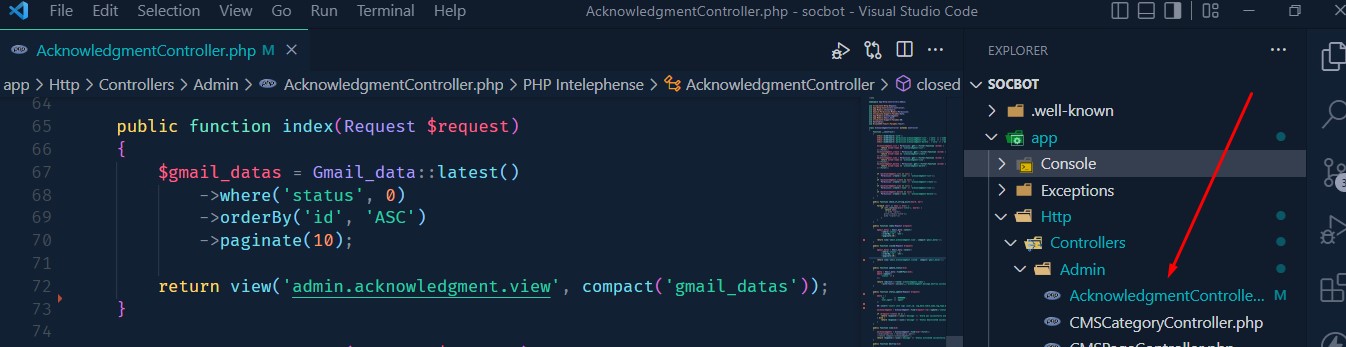
view.blade.php Folder Structure
    socbot
        -resources
          -views
            -admin
              -acknowledgment
                -view.blade.php
view.blade.php
Laravel blade file return a view page which contains the data.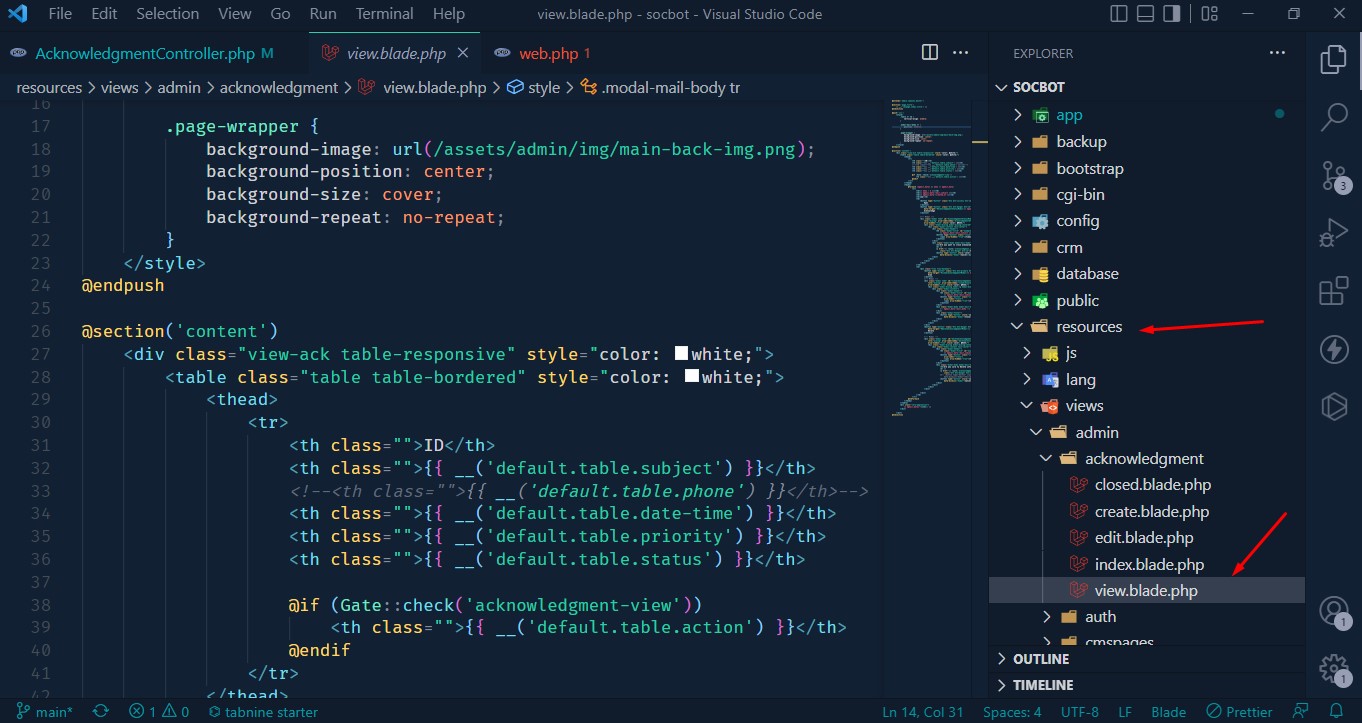
Output: Acknowledgment Table
AcknowledgmentController.php
update_status function update the acknowledgment status and send it to close table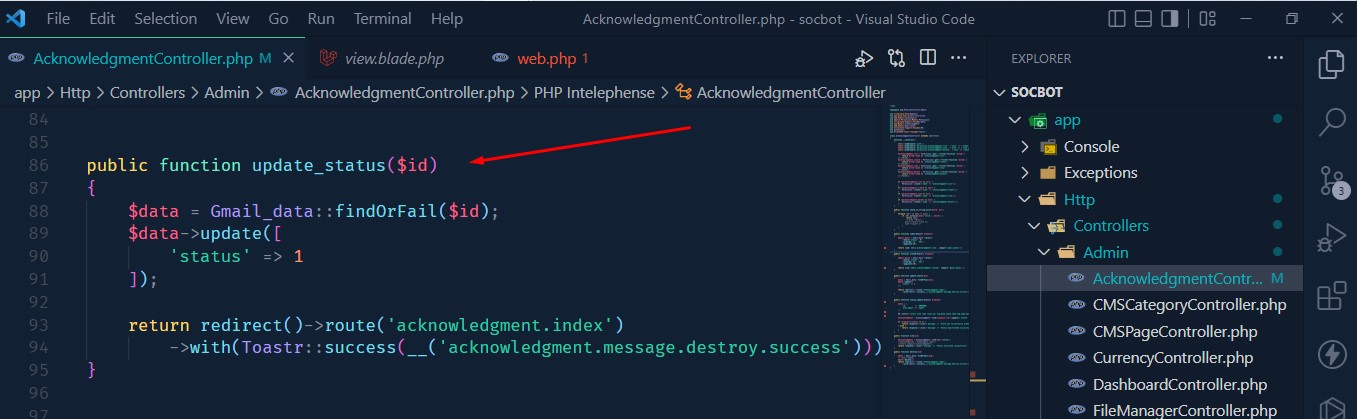
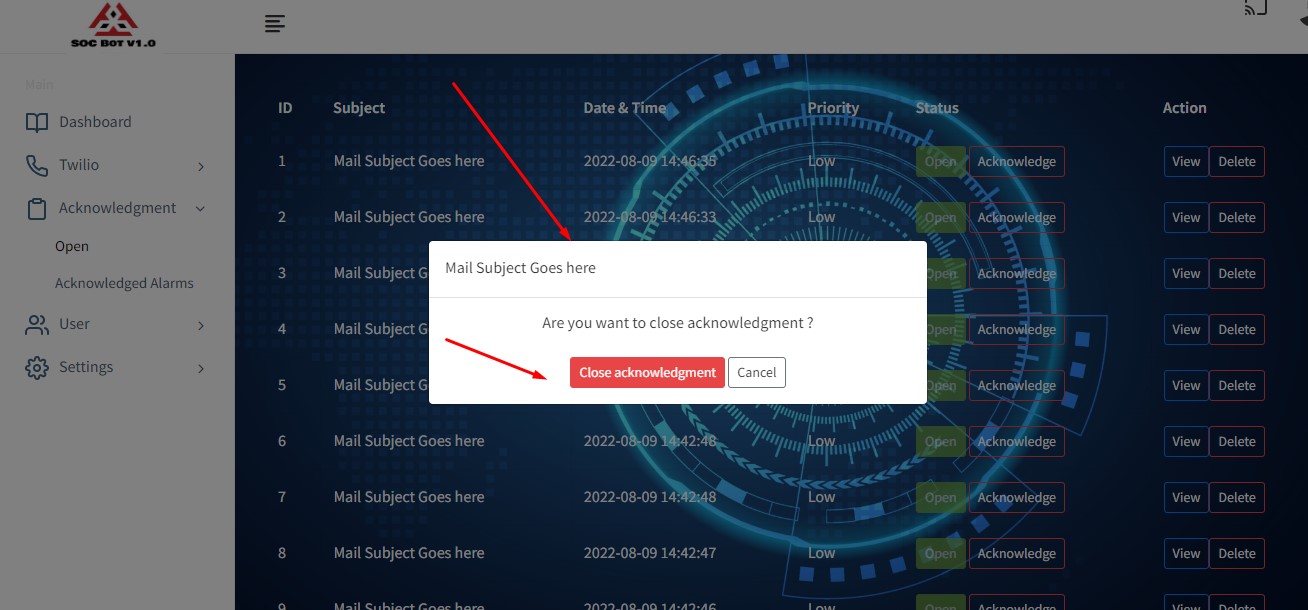
Output: Acknowledgment Update Status Popup
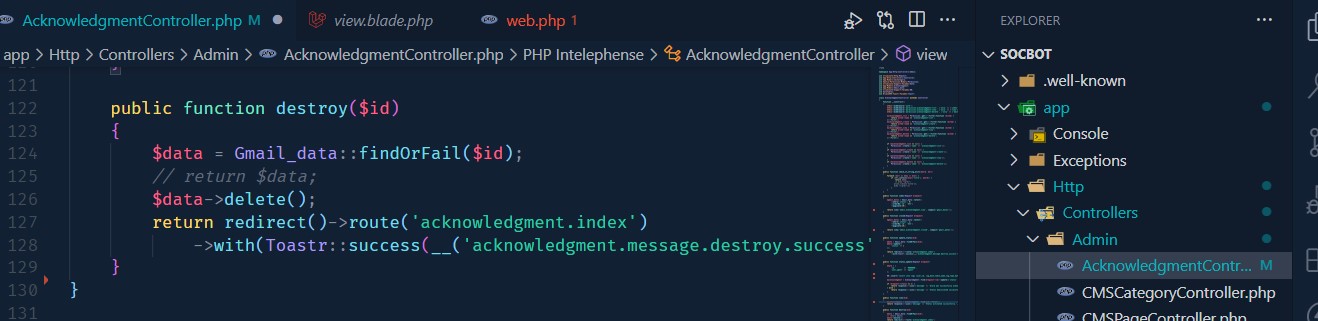
 Acknowledgment View and Delete Function
Laravel automated phone call
Laravel has the functionality to create the task scheduler to help you create some automated script in certain cases. For that we have follow some step
- You have to open the terminal inside the directory and run the command to create a new artisan command.
-
php artisan make:command MakePhoneCall - Now you can see the a file created into the
app->Console->Commands->MakePhoneCall.php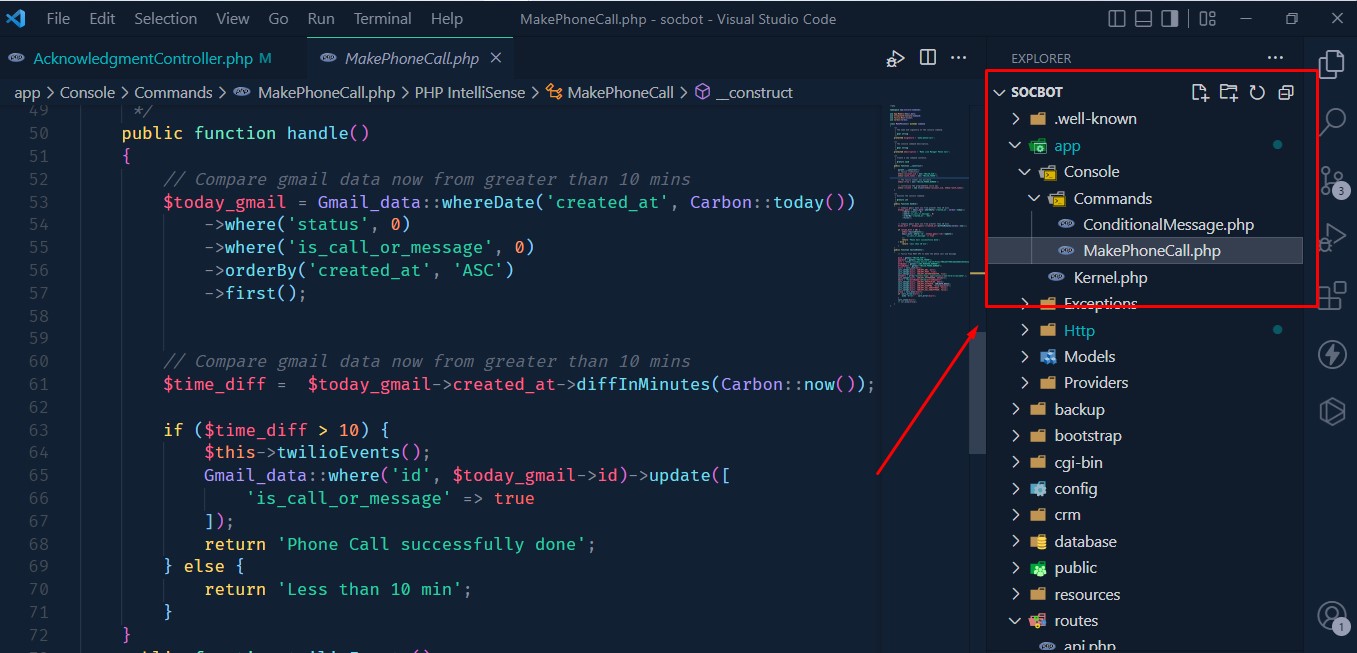
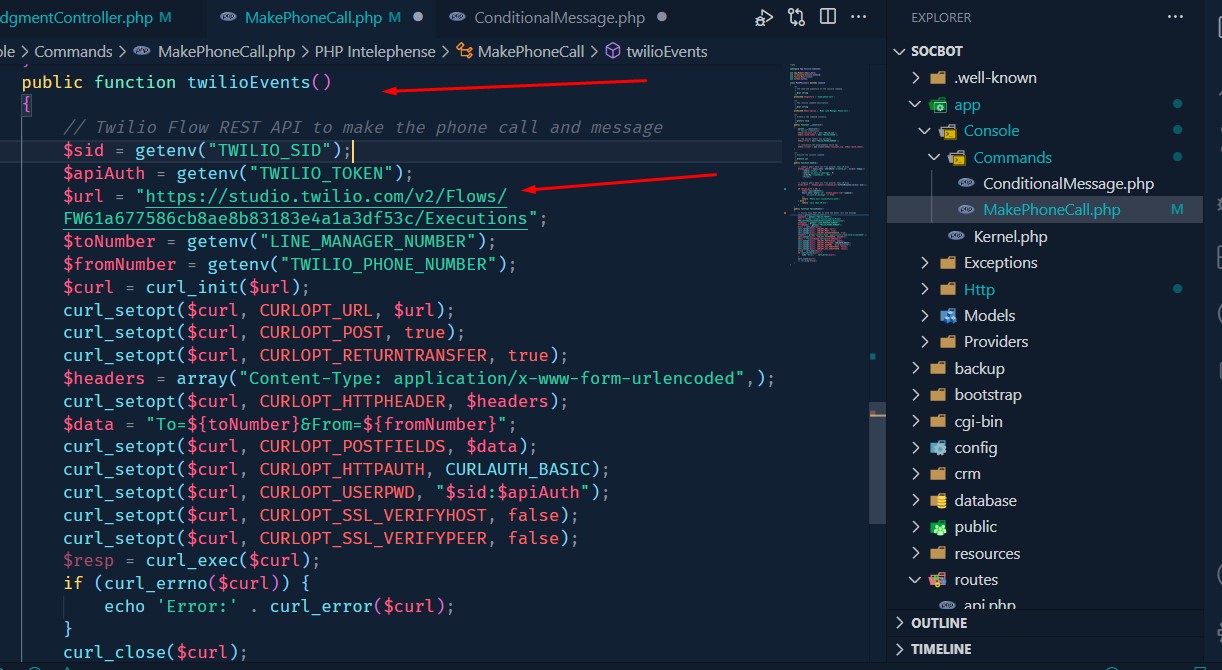
- If you see the code the logic has been set for If the new gmail data inserted time is greater than 10
minutes then the system send a phone call to the line manager using Twilio Stuio Flow REST API. check
the twilio code below.
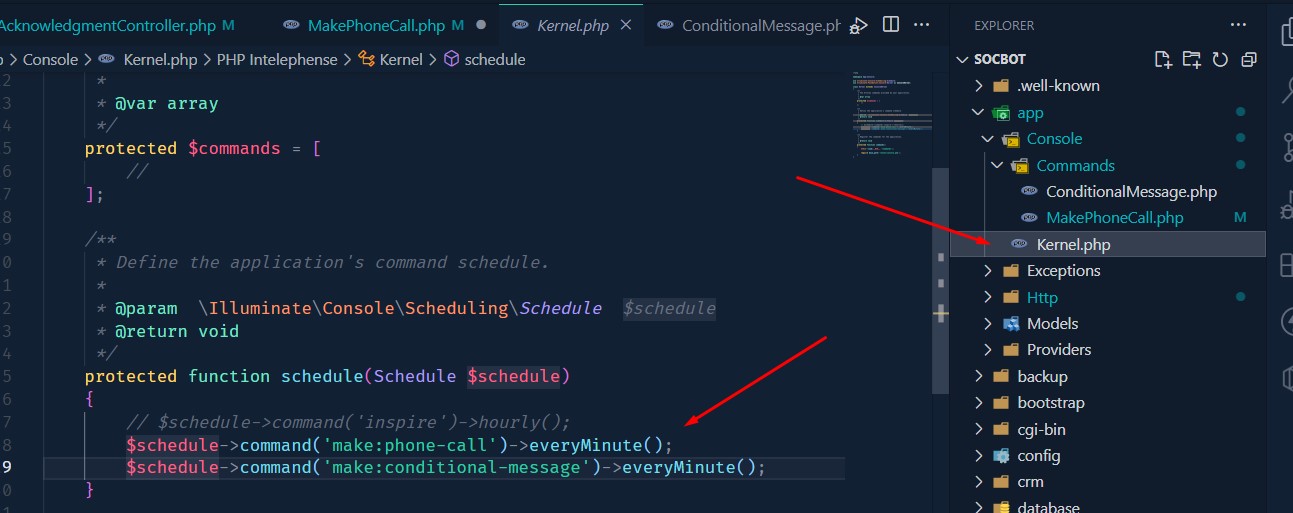
- Now you have to set interval time inside the kernel.php file
- After setup everything you have run laravel command on the terminal
-
php artisan run:schedule
MakePhoneCall.php Folder Structure
    socbot
        -app
          -Console
            -Commands
              -MakePhoneCall.php
Laravel automated Messages
we alread know how to create laravel task scheduler now You have to follow the same step to create the automated message script.
- You have to open the terminal inside the directory and run the command to create a new artisan command.
-
php artisan make:command ConditionalMessage - Now you can see the a file created into the
app->Console->Commands->ConditionalMessage.php
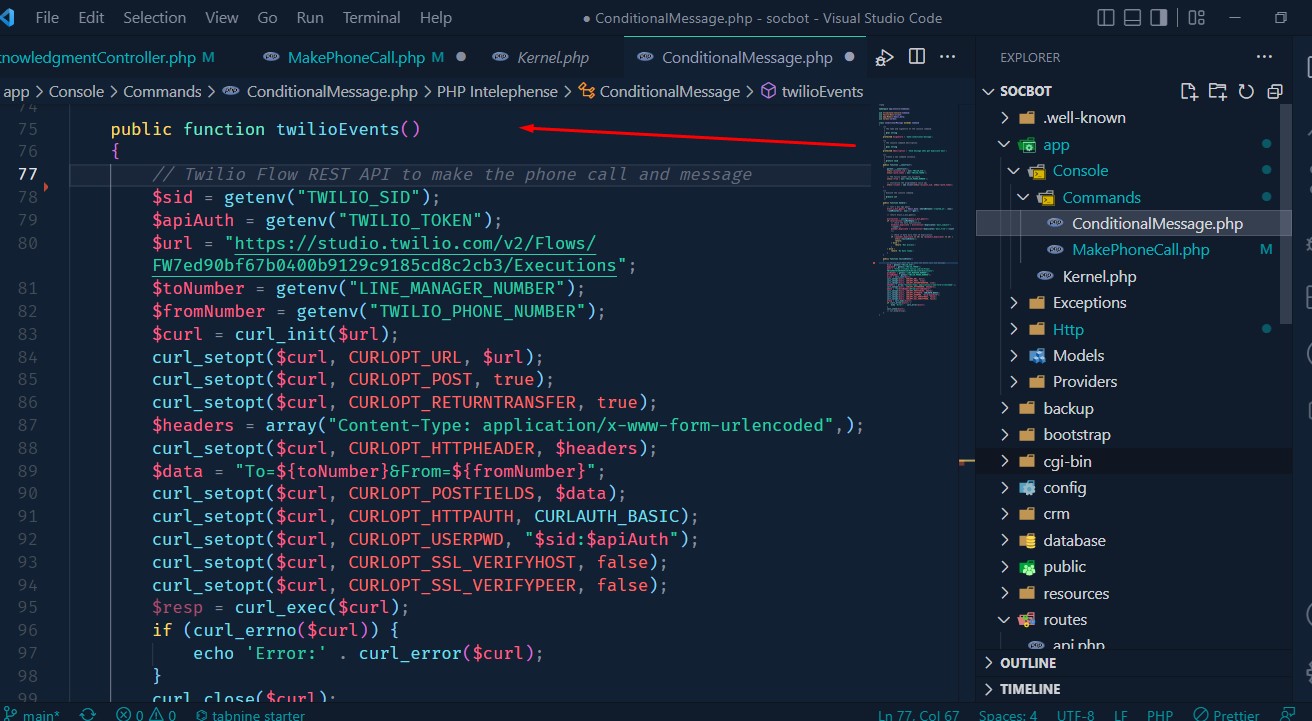
- Here we check if has same email sender and same subject more than 15 within last 1 minute then
generate automated message to the line manager using Twilio Stuio Flow REST API. check the twilio code
below.
- Now you have to set interval time inside the kernel.php file
- After setup everything you have run laravel command on the terminal
-
php artisan run:schedule
ConditionalMessage.php Folder Structure
    socbot
        -app
          -Console
            -Commands
              -ConditionalMessage.php
GitHub Push & Deploy
Git is a version control system which makes developer life more easier. We using Laravel Forge and It helps us to connect with our github and directly deploy without any hassle. We have to run some command to push the code to the github and deploy it.
- Check git status for stage
git status - git add staging
git add . - git comment
git commit -m "Your comment" - git push to upload
git push -u origin main